
How I Edit Moody Look Photo in Adobe Lightroom Mobile
Sunday, May 24, 2020
2 Comments
In this rainy
season, I sometimes hard to find a place where it would be good when it is
cloudy. Looking for a sunset or sunrise could be that difficult. We have to
turn our mind in order to enjoy the gray skies. The example is to take
advantage of fog or atmosphere when the sun is shy to shines. Apparently, hunt
photos with fog as the object or even decoration makes different kind of mood
and point of view, sometimes our photos look more dramatic because of the fog
that decorate our photo.
In this day,
editing is just a normal activity in photography. Everyone wants to make their photo looks
more beautiful. It’s like a tea without sugar, I believe that it can be nice
taste as well but it feels plain at the same time. Either basic edit or
advanced. In my opinion, editing a photo is depends in our own taste. You can
make your photo colored pastel like Wahyu Mahendra, looks bright like Kadek
Arini or Her Journeys a.k.a Anggey, or make the photo looks dark. A lot of
people called it as moody or folk photo.
Well, let’s get
into the topic.
All you need is
smartphone, Adobe Lightroom mobile application, and of course a will. Because
work without a will is just useless. And the most important is your raw photo.
There’s no specific photo that you can edit, but if you can capture photo with
nice angle, light, and object, you can edit it way easier.
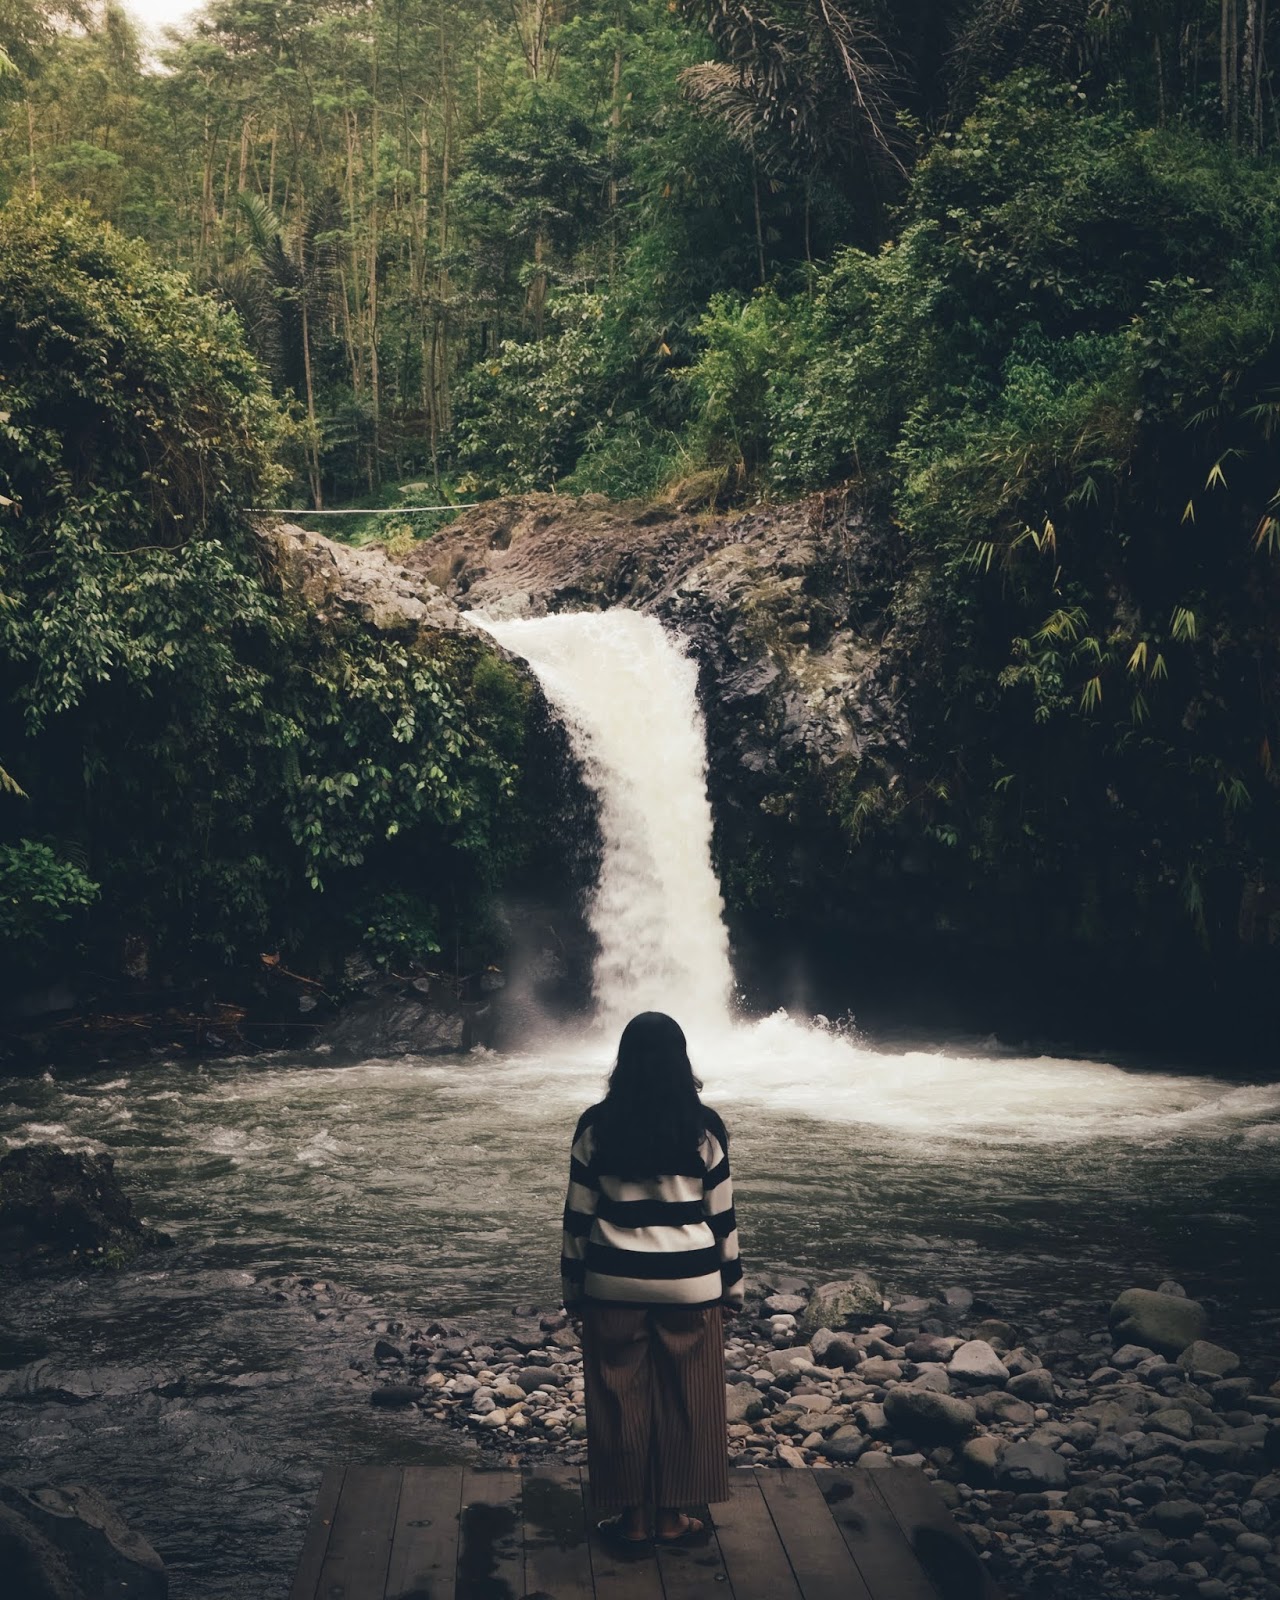
The photo above is
my raw photo. I guess, the color, angle and light is quite nice. The waterfall
make the composition looks more interesting.
First, open Adobe Lightroom mobile
application. You can download it from appstore and playstore for free! I am editing with iOS. You know, the color you’d get
when you edit with iOS and android would be different. Sometimes, Android looks
too vibrant for color display and iOS display has the closest one to the real
color. But, if you have the newest android device, that’s not a big
deal.
Import photo to
the app. Open the photo until it shows you light, color, effects (and something
like that) menu.
BASIC
The first step
is you have to adjust the exposure, contrast, and all in basic menu until the
light is nice, depends on your taste. Every photo has different character.
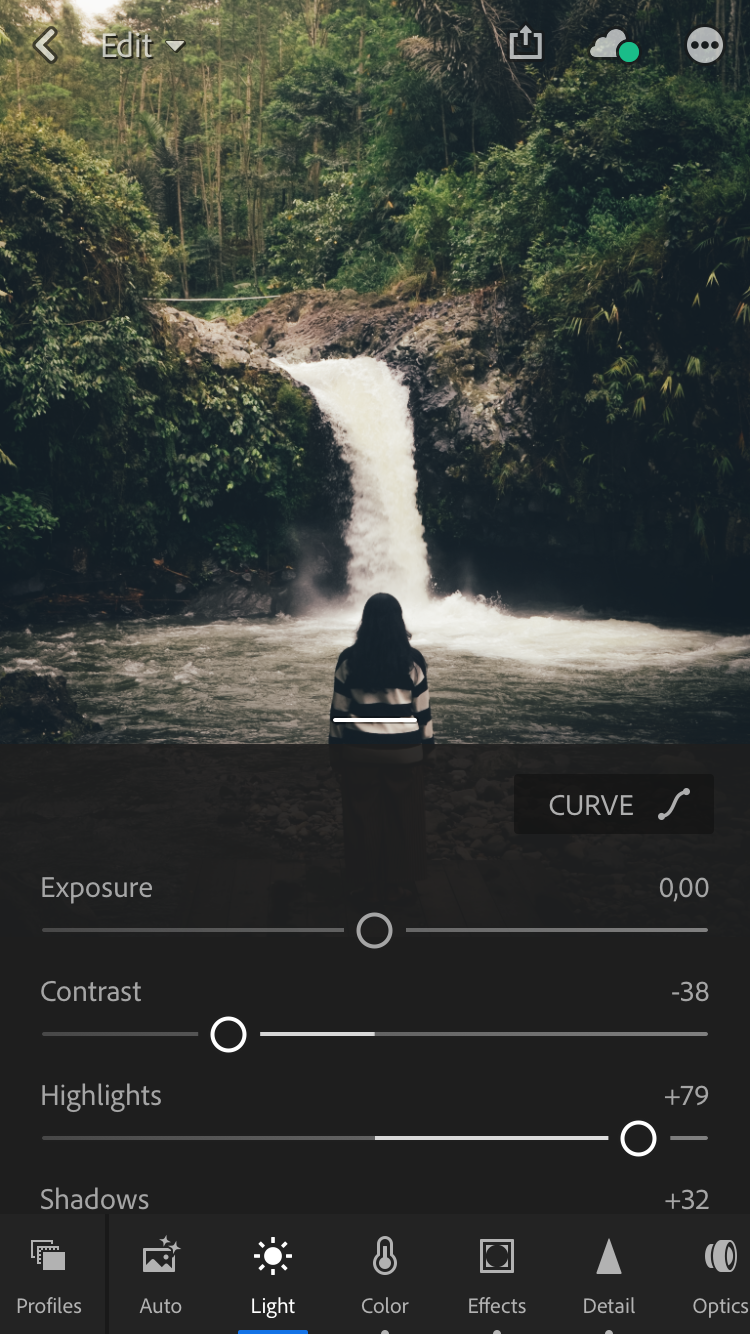
Next step is adjust
the curves!
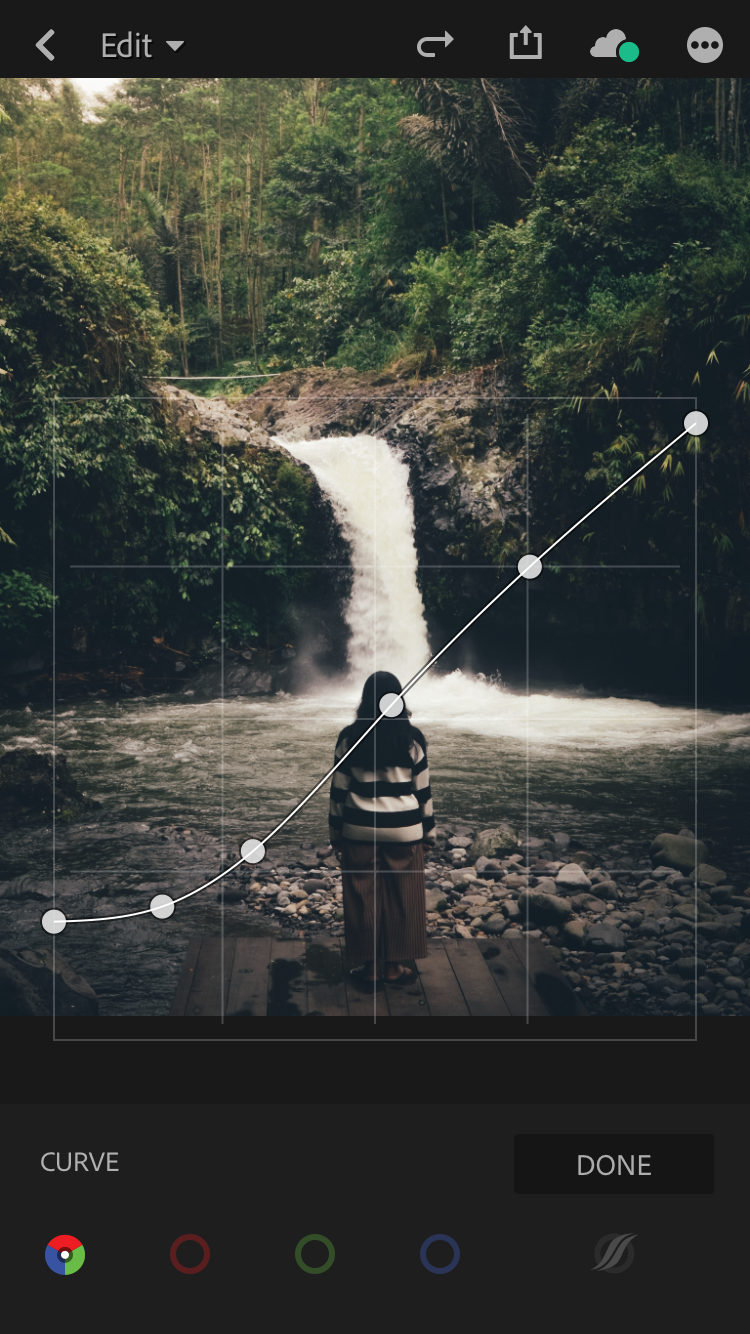
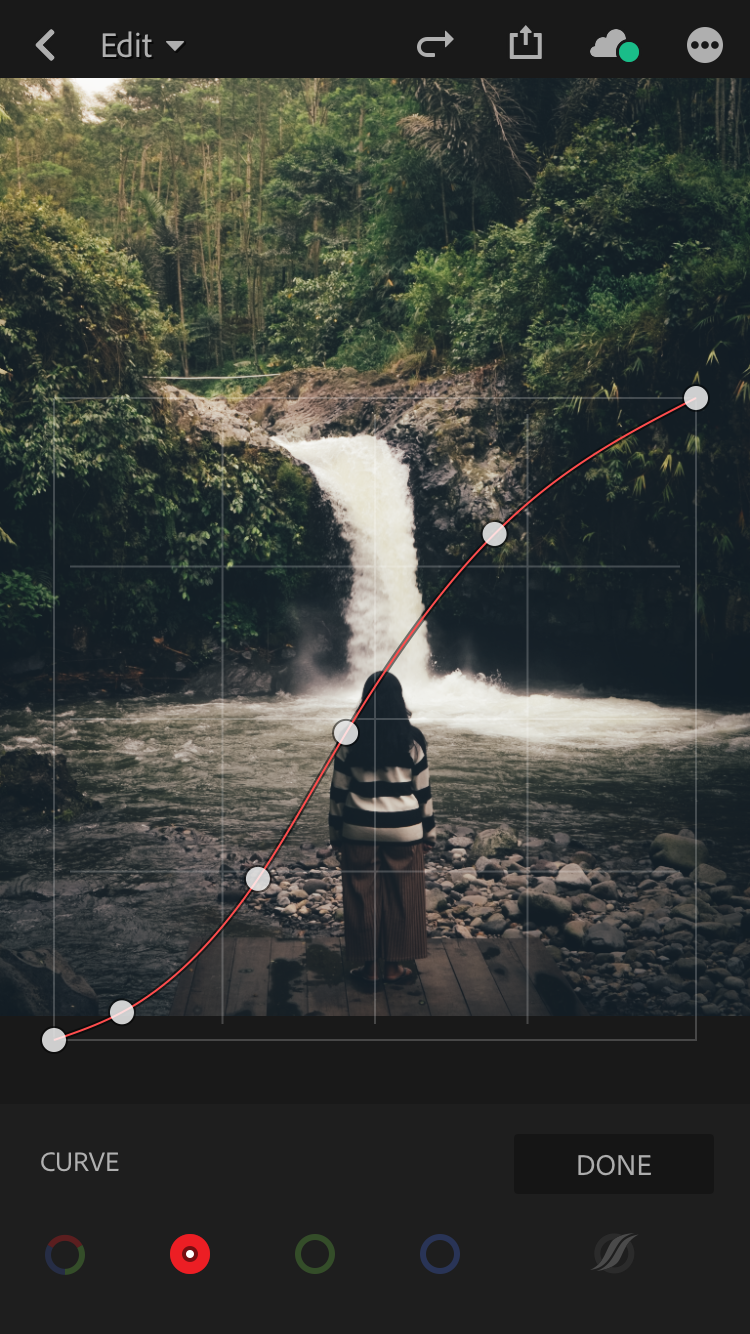
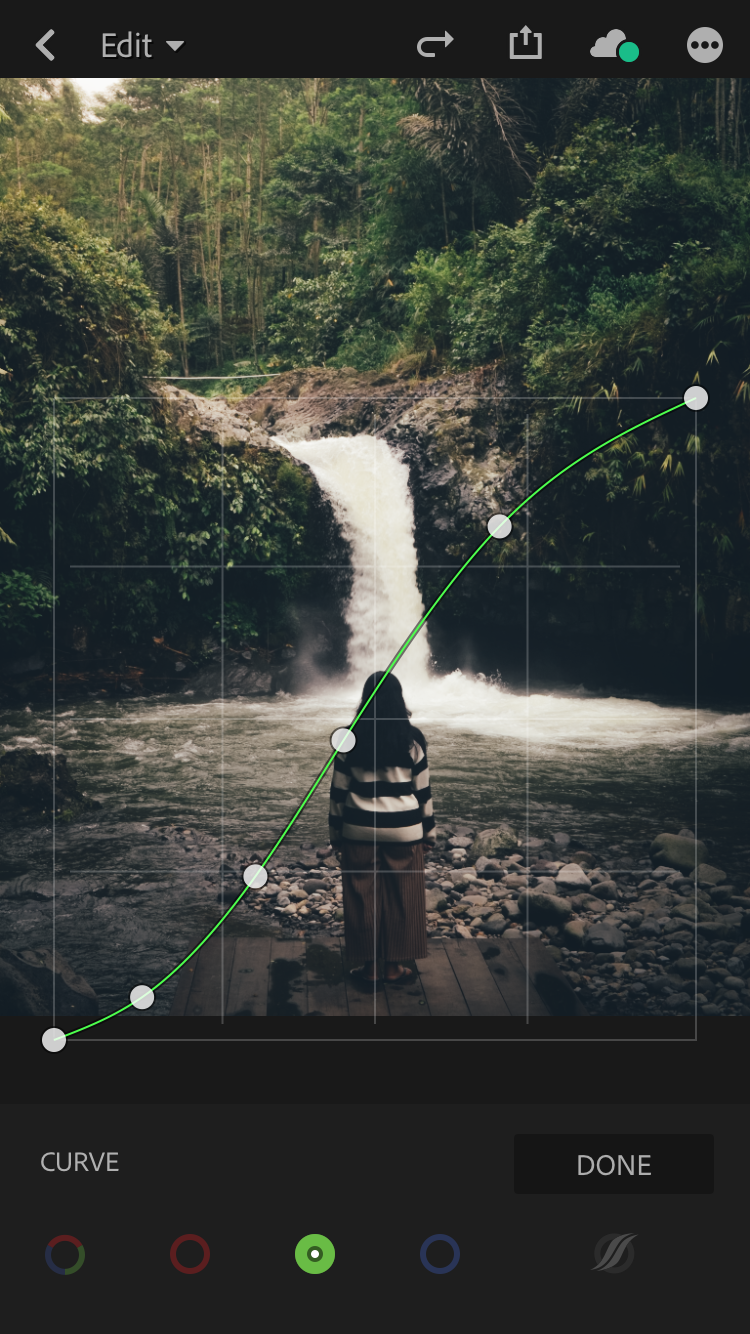
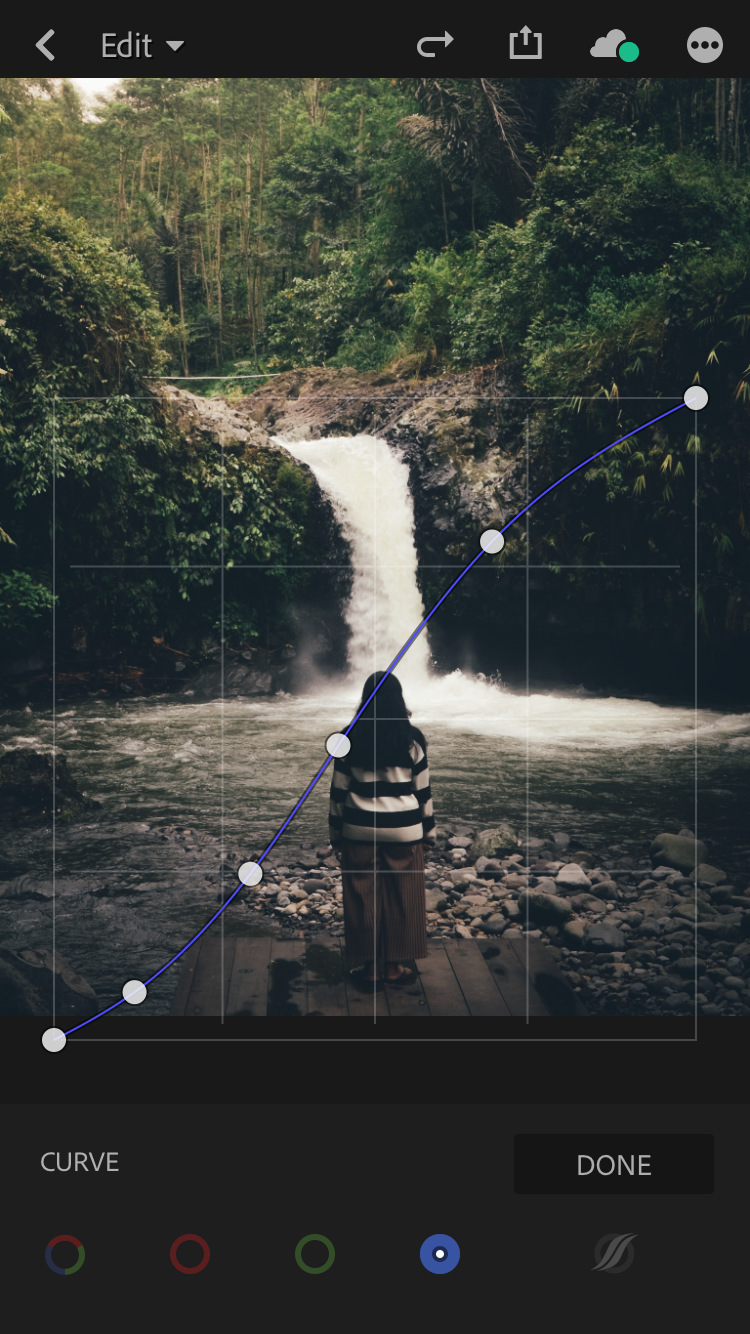
Adjust the curves
until your photo looks soft. You can copy my curve settings, sometime it’s
gonna works well in any kind of photo! Especially in dark condition.
Everything is good?
Well, let’s continue to COLOR menu.

Adjust the white
balance by sliding up or down the temperature and tint. If your photo looks too
warm, just decrease the temperature. If your photo looks cold, then increase
the temperature. The characteristic of moody photo is look desatured, so you
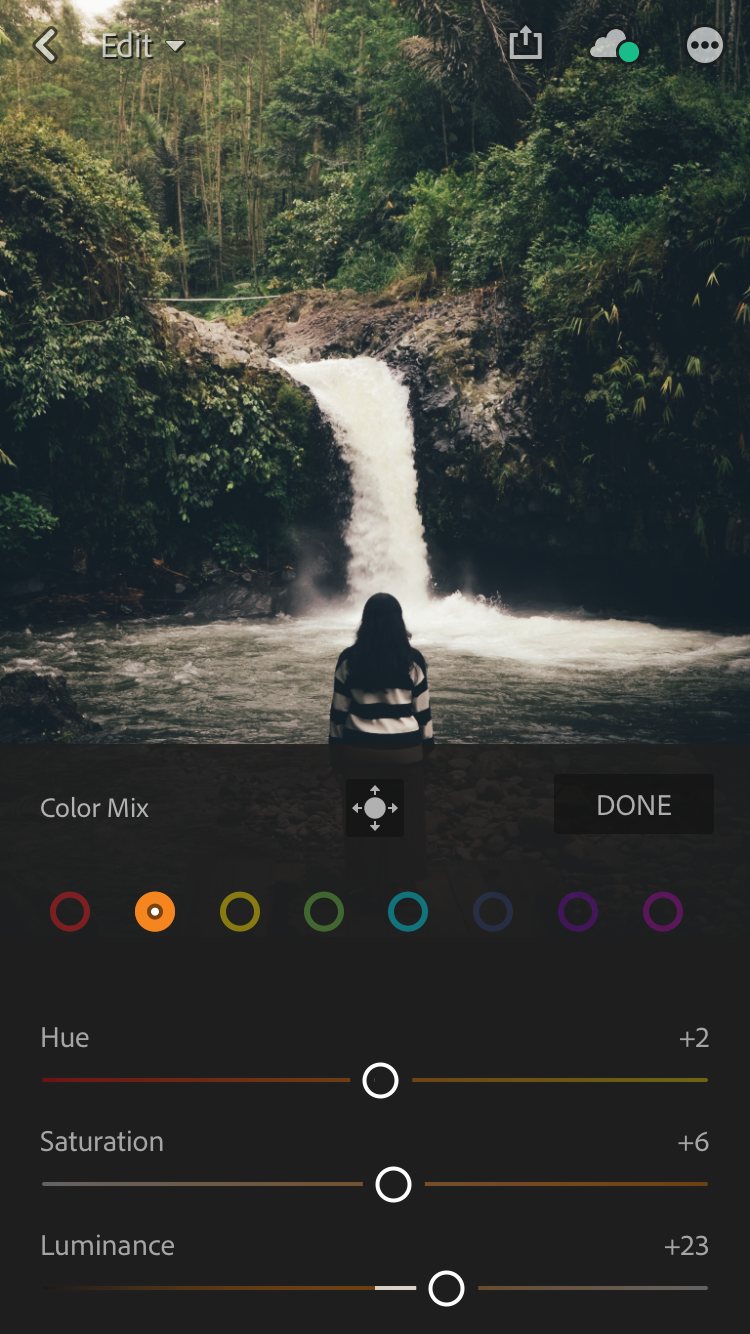
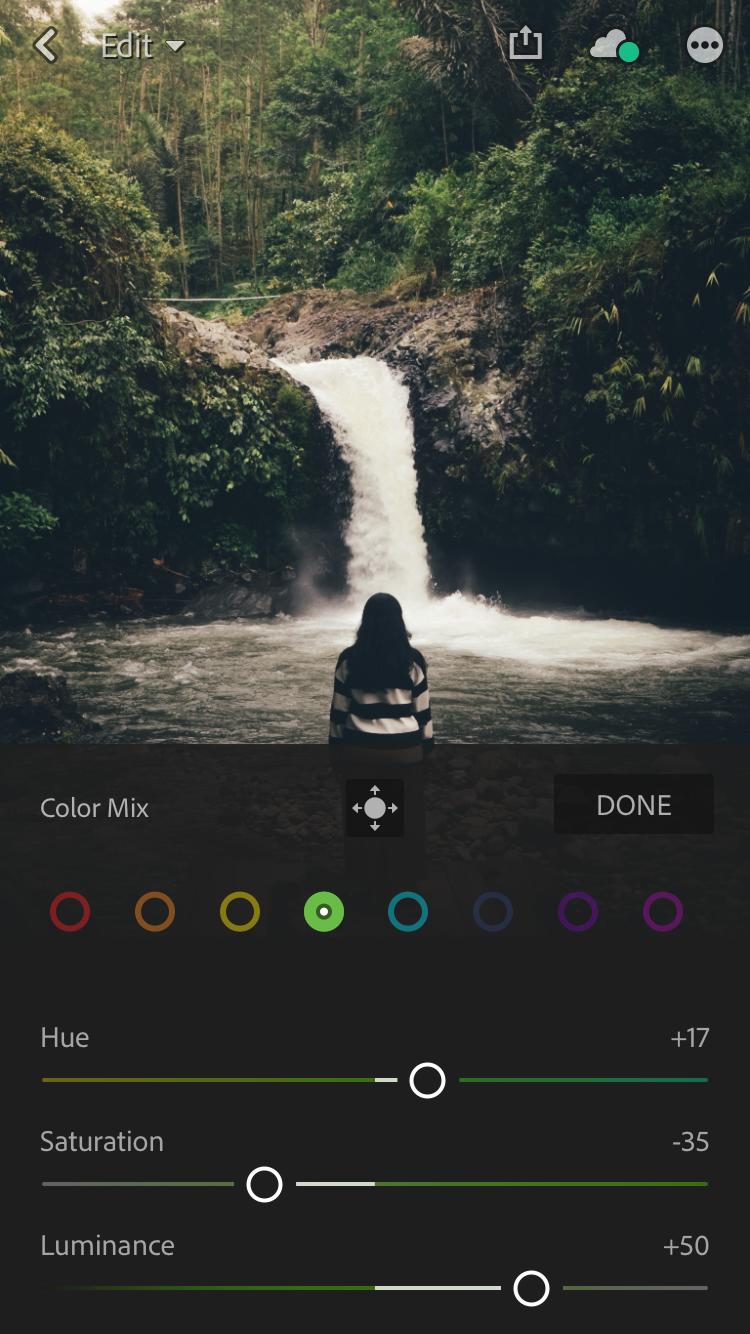
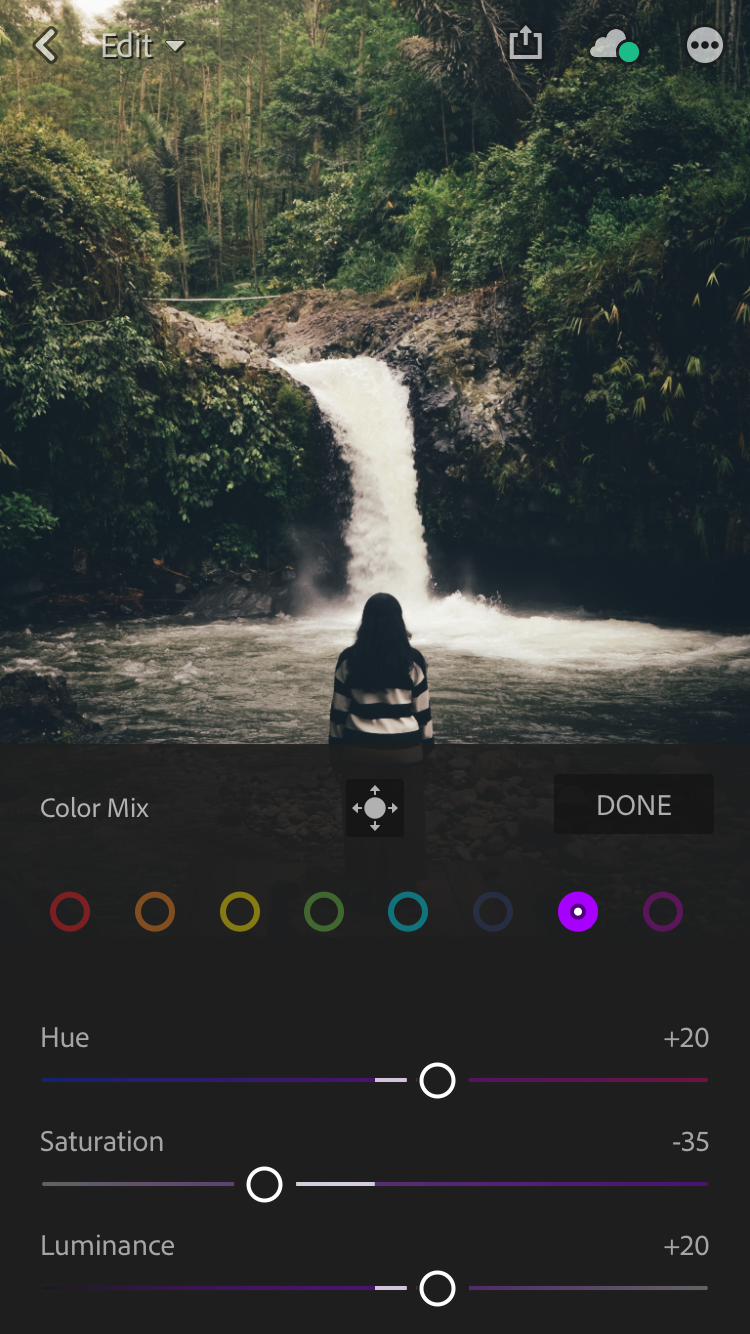
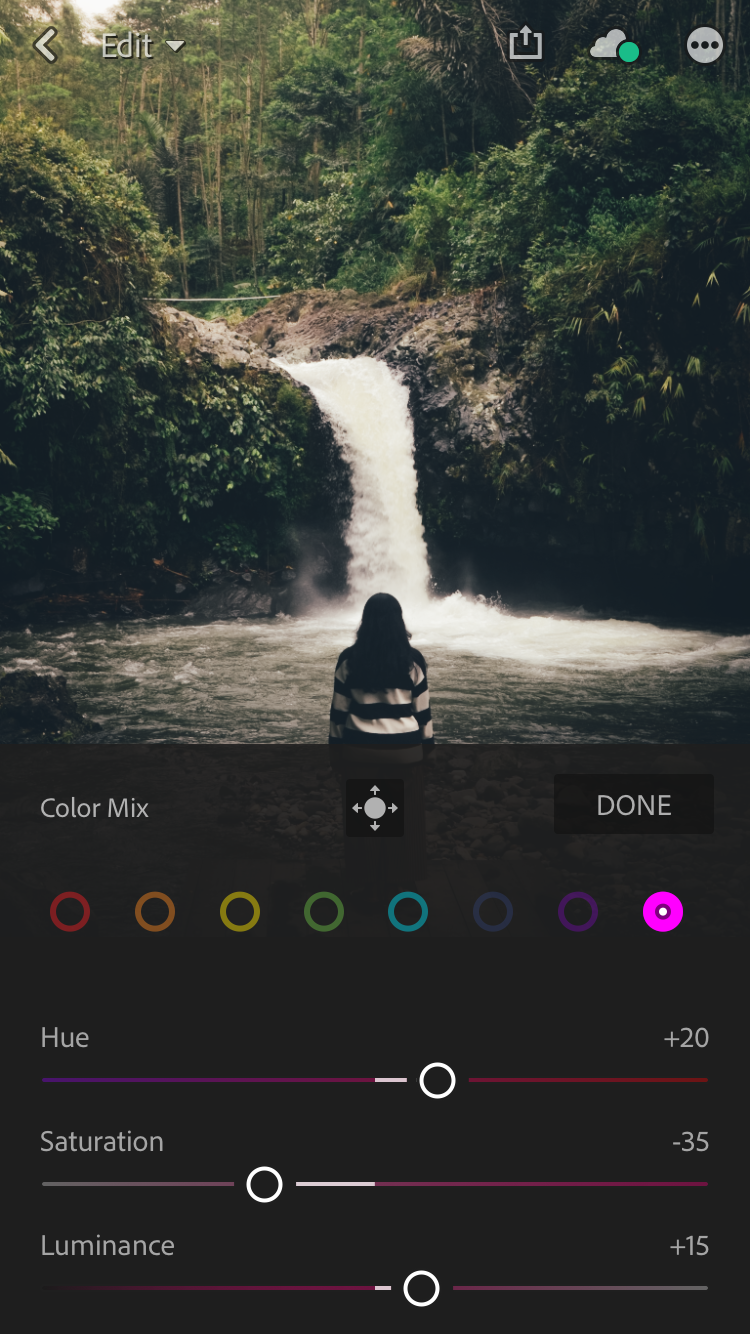
can drop down the saturation and a bit vibrance. Then continue to MIX tool, which is still inside COLOR menu. This is my favorite!
Because we can adjust every single color depends on our taste. There are 8
colors you can adjust contain Hue, Saturation, and Luminance. Just play your taste
so you can make better color, it’s gonna be fun! Or, you can see my color
settings below.


EFFECTS
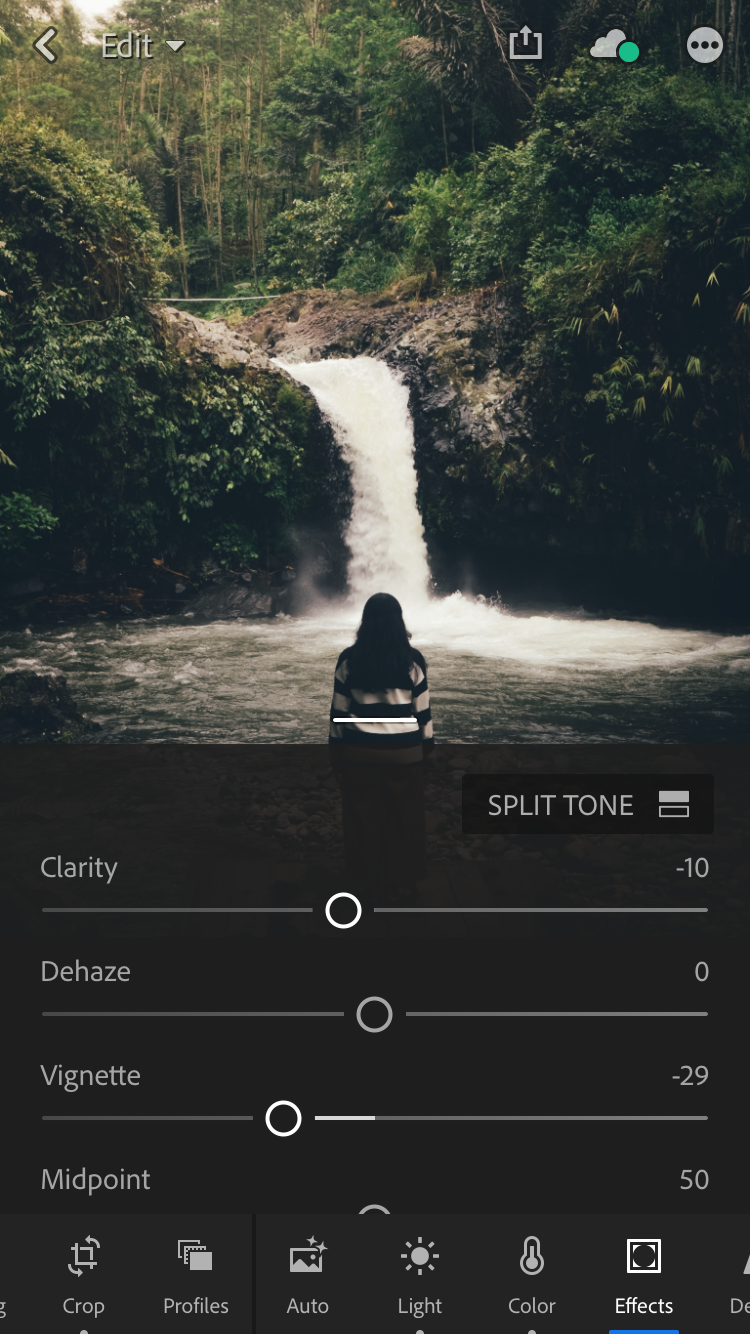
Adjust the
clarity but don’t too much, it can increase the detail if you raise it up. Drop down vignette until
the corner looks darker. It can makes your photo more dramatic! You can adjust
the split tone as well in case you need it. But, I don’t used it as the color
in my photo is good. If you are curious with this tool, just try to make the
shadow looks a bit bluish. It makes you like a pro film color grader! Hahaha kidding. But, seriously it can makes the color so interesting.
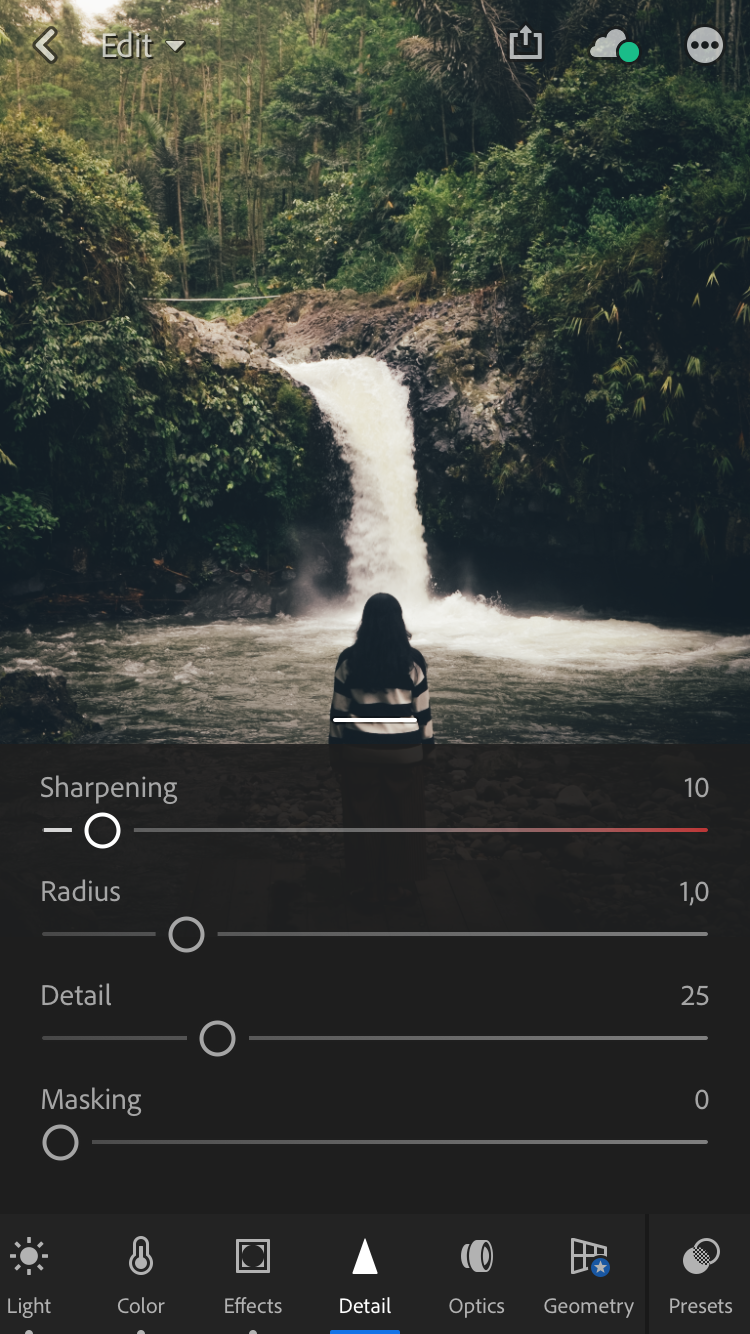
DETAIL
Raise up a bit sharpening.
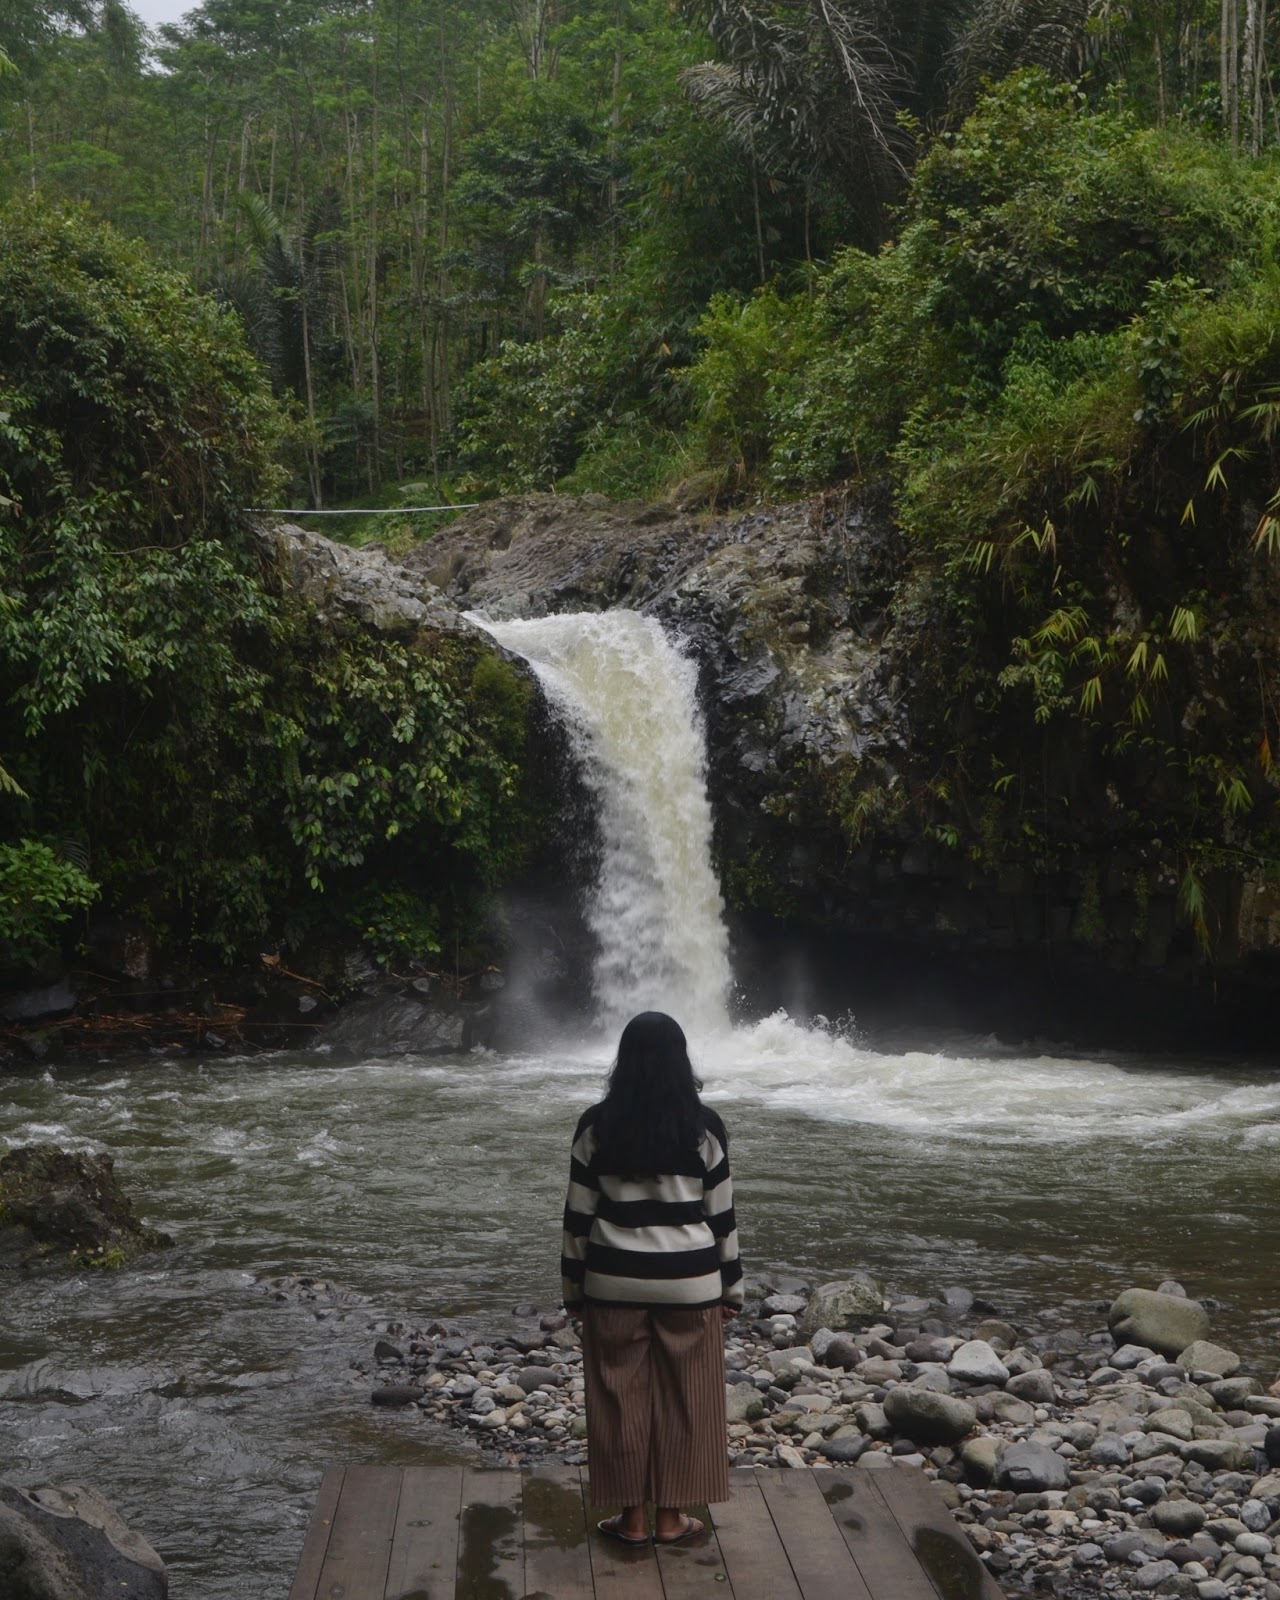
And this is the
result!
This is good enough
I guess. And the last step is save your photo to camera roll, make sure you
export it to maximum image quality!
That’s all!
Note:
This
tutorial wouldn’t be applicable to all photos, even my other photo as well.
Every photo has different exposure and color, which means has different
treatment. By following this tutorial doesn’t mean you will get the same tone
color with mine. That’s why you need to train your taste and feeling to make an
amazing photo. Because practice makes perfect, right?
Should I make
the second tutorial based on all photos that I uploaded on my Instagram
account? Just comment below or reach me on Instagram's Direct Message.
Follow me on Instagram: @wi.sepi
Super love this tone! And yeah I agree with you that this tutorial perhaps isn't applicable for all photos due to the difference of brightness, exposure, color, and so on. All we have to do is just to practice, practice, and practice until we get the tone or mood that we love. I really wanna improve my photo editing skills in Lightroom. So, more tutorials if you don't mind, pleaseeee :D
ReplyDeleteYeah, practicing our taste on editing skill is the most important. Because sometimes preset can't fully handled it, that's why mostly I need any adjustment after apply my own preset.
DeleteYes, I will make the other one! Thank you for reading my articles, hope you love it!